How To: Simple DIY Outdoor Side Table

Are you looking for an easy and affordable way to spruce up your outdoor space? A simple DIY outdoor side table might just be the answer!
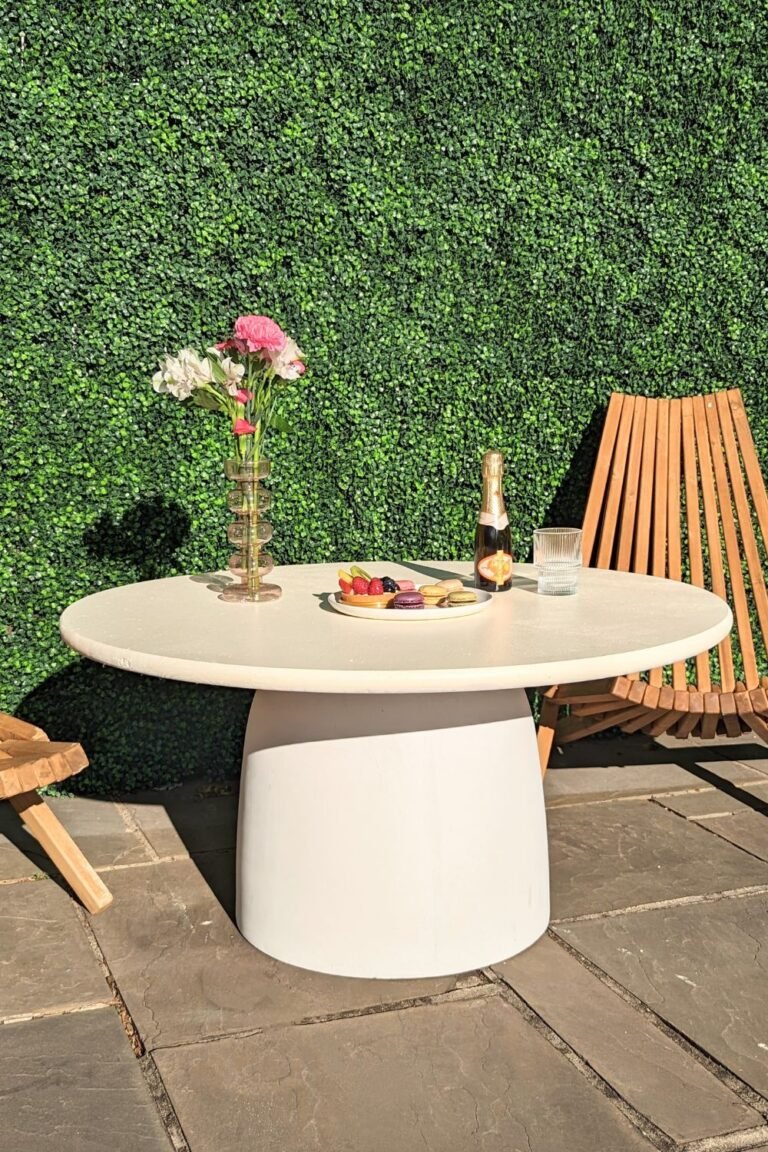
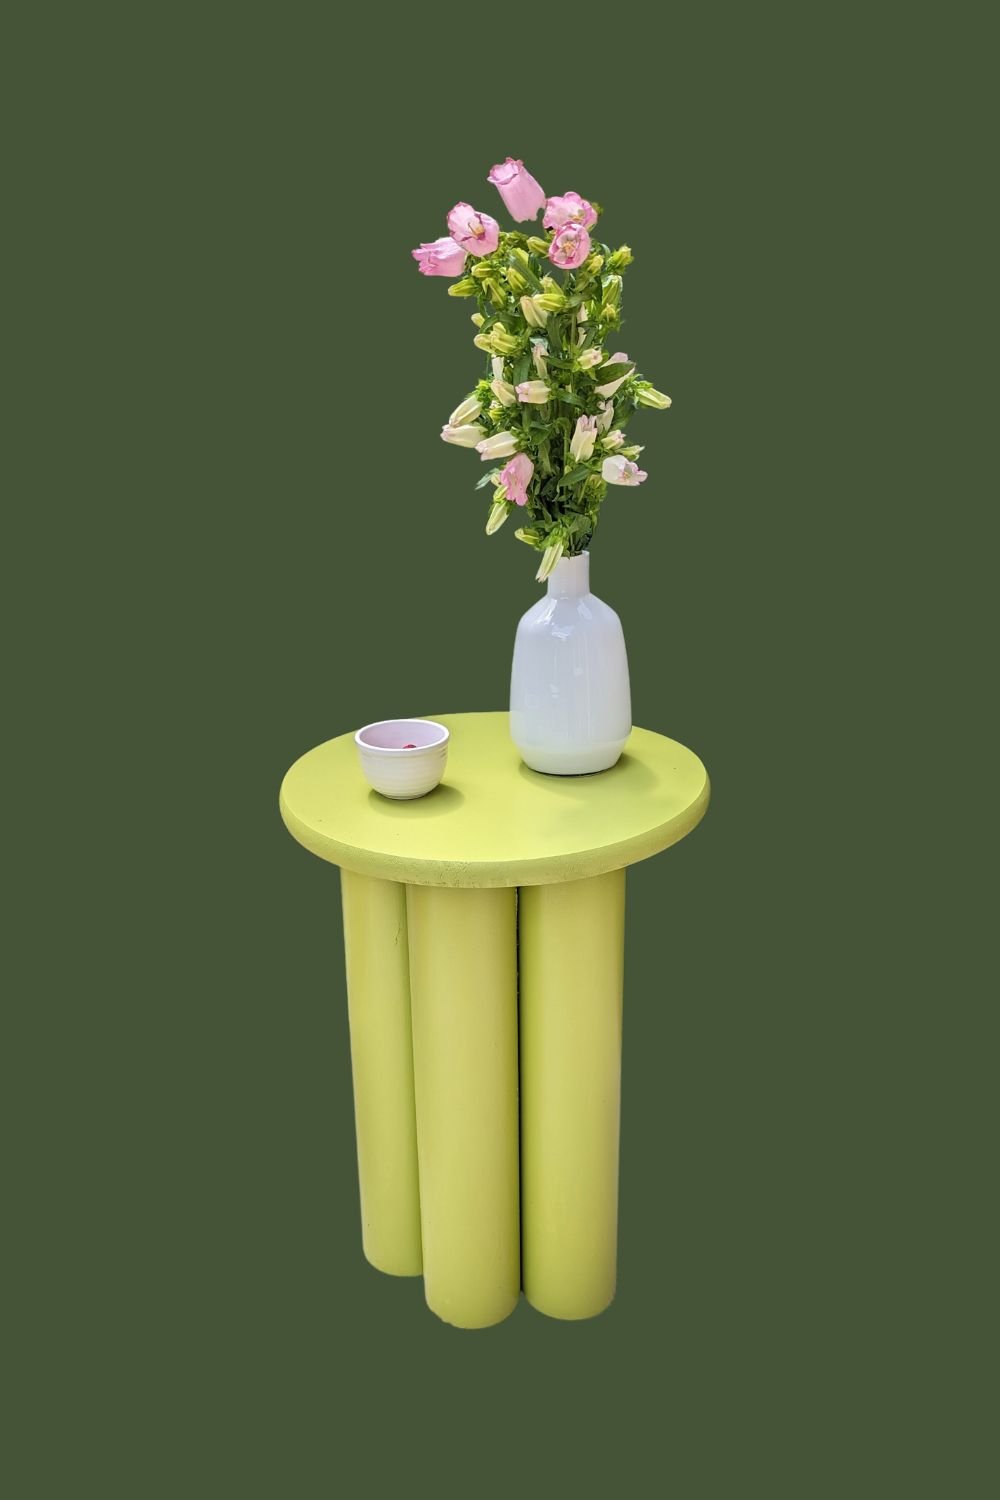
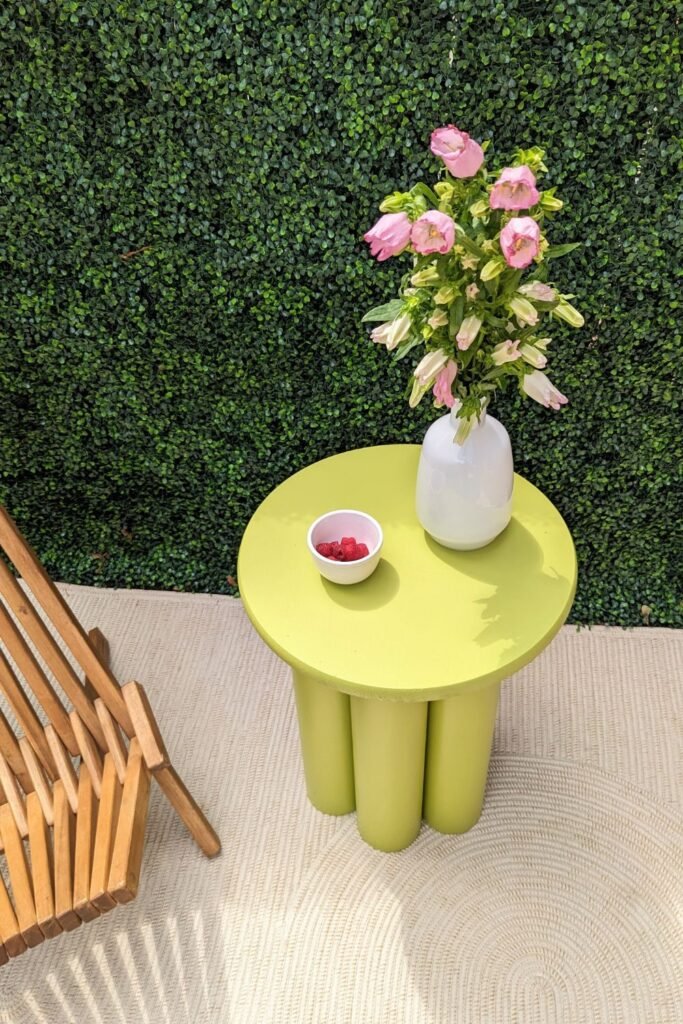
I wanted a funky side table so I made this scalloped side table. I love that it looks both modern and bohemian with the bright color. You can make this table any height depending on what size tubes you use.

I made this DIY outdoor side table as a patio furniture project for the Spring One Room Challenge. Be sure to check out the other amazing projects on the One Room Challenge website!
Watch my reel on how to make this DIY outdoor side table here, and you can find more home DIY inspiration here!
Materials and Tools for DIY Outdoor Side Table
- 16″ Pine Wood Round
- PVC Pipe from hardware store
- Behr Spray Paint + Primer (satin finish)
- Behr Marquee Paint (satin finish)
- Liquid Nails
- Paint roller
DIY Outdoor Side Table Building Instructions
- Prime your wood round and PVC pipes with the spray paint/primer. I used two layers of primer to make sure all the pieces were adequately covered. Let them sit and dry for a minimum of 4 hours between coats. The PVC pipe tends to cause the paint to run so spray slowly.
- Paint your primed wood round and PVC pipes with your color of choice using a hand roller for a smooth layer. For the PVC pipes I started from the bottom and rolled up so I could have a good grip as I rotated as I painted.
- Let the paint dry for a minimum of 6 hours.
- When your table pieces are dry, arrange the PVC pipes in a circle like you want it to look.
- Squeeze liquid nails on top of the pipes and in between the PVC pipes.
- Place the wood round on top of pipes and add pressure. Smush the PVC pipes together again if they shift.
- You can add a heavy object on top to make sure the pipes adhere to the wood round.
- Allow the liquid nails to dry for at least 24 hours.
- Once the cure time is over, try lifting your table to make sure the pipes don’t shift. If they do, just add another layer of liquid nails.
- Paint over the excess liquid nails to have a clean look underneath!
Congratulations! You now have a simple DIY outdoor side table that is perfect for outdoor dining or entertaining. Enjoy!
If you make your own outdoor side table please tag me on Instagram, I would love to see and share your patio project!