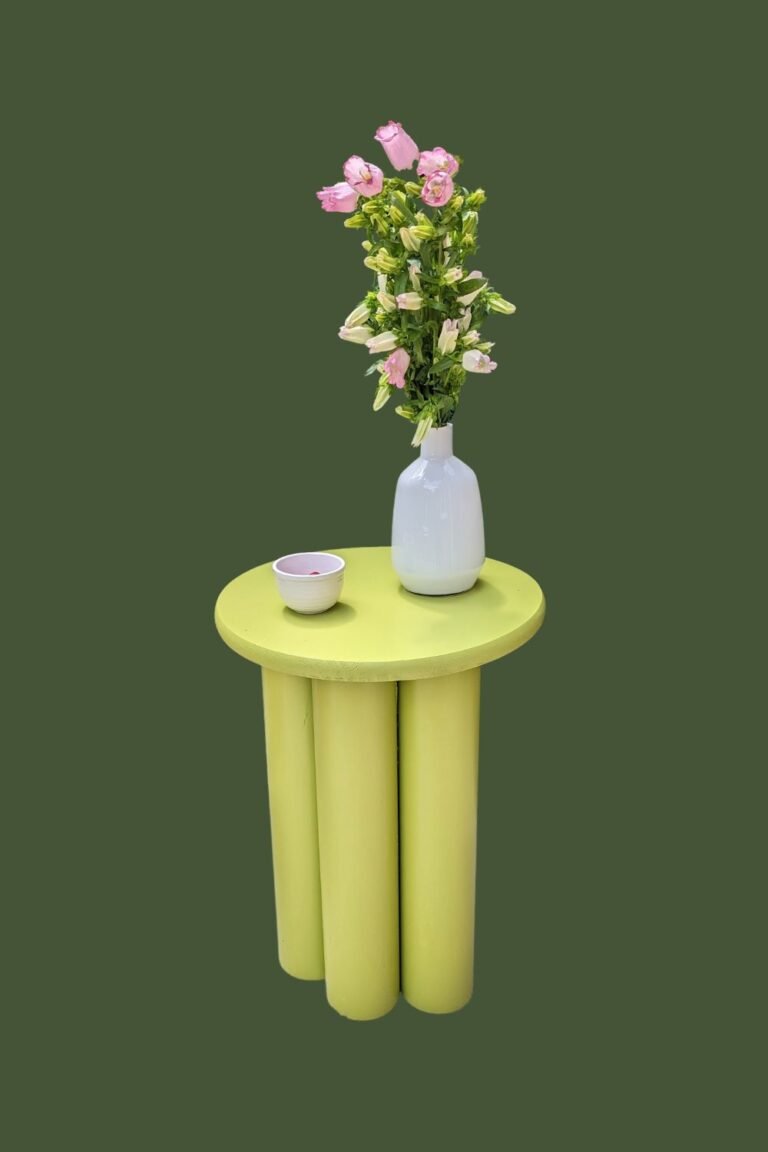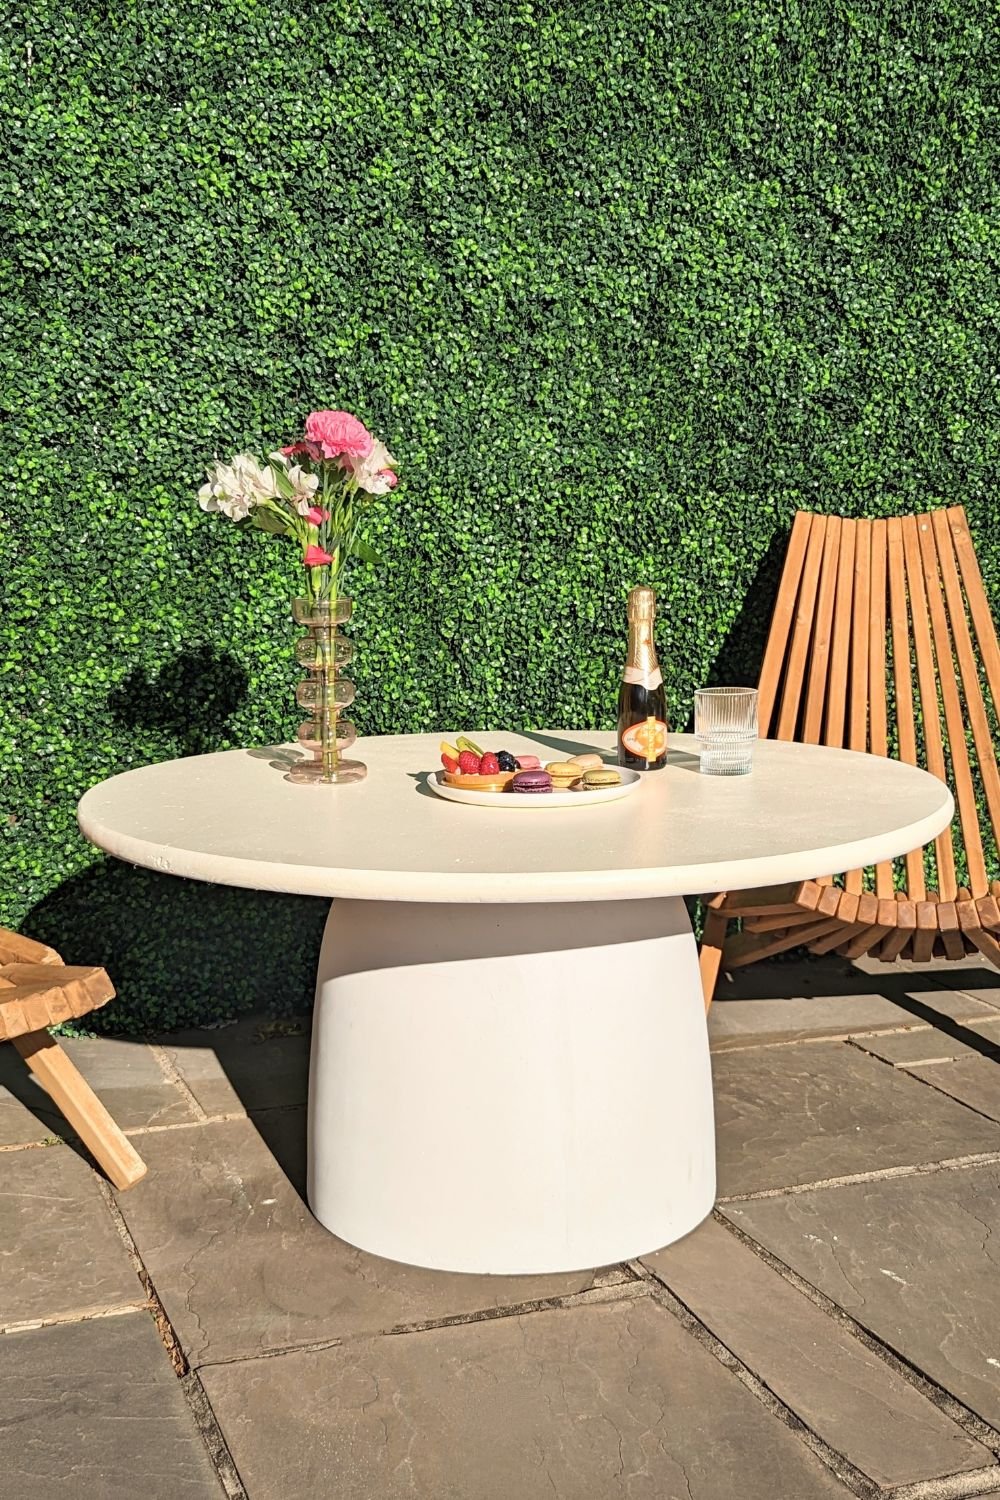
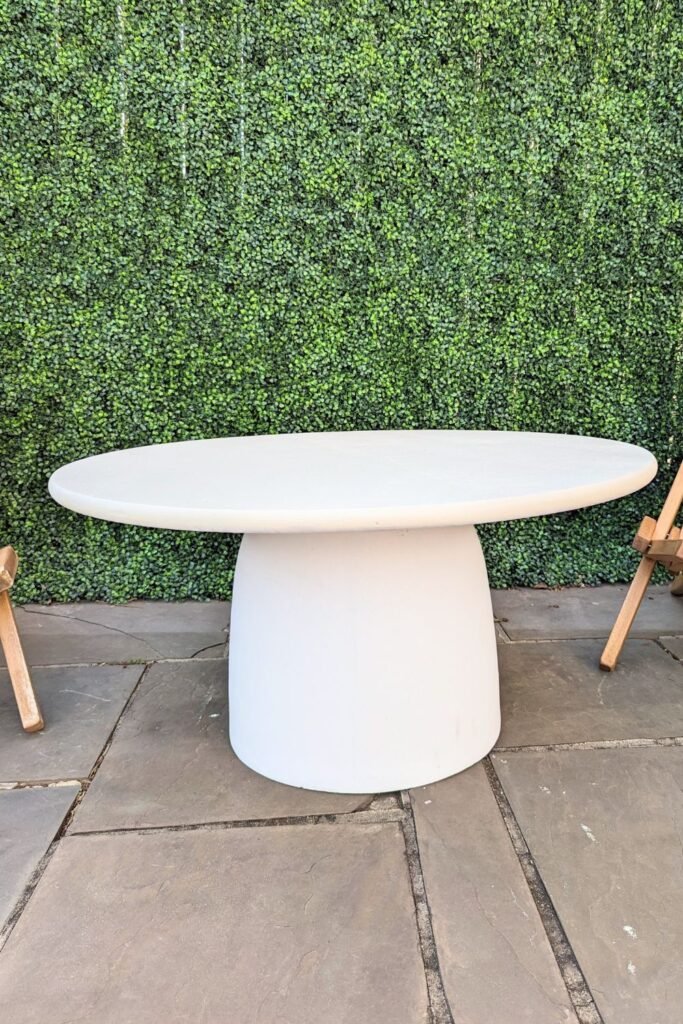
DIY Coffee Table: Round Pedestal

Let’s make an easy, durable DIY coffee table! I decided to make a round pedestal table because it doesn’t require power tools and fits the vibe of our space. I found some inspiration on West Elm and figured I could remake it but with a lower price point. I saved about $500 by making it myself. I think you could save even more money by finding a second hand planter on Facebook marketplace or Nextdoor.
I went with a concrete planter and wood since these materials generally do well outdoors. I painted the wood to get the color I wanted and to essentially waterproof it. I used the Behr Marquee paint for outdoor use. Ever since I built the table, the wood has held up very well. There’s no sign of wear or moisture absorption. It’s also easy to wipe off when dirt or leaves get on it. In the winter I will probably shield it with an outdoor furniture cover.

I made this DIY as a part of the Spring ORC to refresh our patio. Thank you again for following along and check out the other amazing projects on the One Room Challenge website!
You can watch my reel on how to make a DIY pedestal coffee table here. And if you love this, you can find more DIYs I’ve made here.
Why make a DIY Coffee Table?
Coffee tables are an essential piece of furniture in any living space. They serve as a place to put your feet up, hold your drinks or snacks, and even as a surface for playing games or doing work. Now that it’s warming up outside, I’ve been using this table as a mini desk so I can get some sun while I work.
However, not all coffee tables are created equal. While there are many coffee tables available in the market, some are made with cheap materials and lack durability. Some plastic outdoor tables look good at first, but they tend to break easily, leaving you with a table that needs to be replaced. For example, the last coffee table we had was made of plastic and eventually got holes in it. During some crazy thunderstorms the plastic furniture would get tossed around. I built this heavier coffee table to be able to withstand high wind.
By making a durable coffee table, you can ensure that it will last for years without any issues. Plus, you can customize it to your liking and make it truly unique!

How to make a durable coffee table
To make a durable coffee table, you will need to use high-quality materials. Designing and sourcing the materials is so fun! You can choose the material that best fits your style and the overall look of your space.
When building your coffee table, it’s important to pay attention to the details. You want to make sure that all of the pieces fit together perfectly and that the table is sturdy and level. You may also want to consider adding protective coatings to your table to prevent scratches, stains, or water damage. Since our coffee table is going outdoors I wanted to make sure I had materials that would withstand the elements. As an optional extra step you could add a coat of liquid epoxy to really make it resistant to weather.
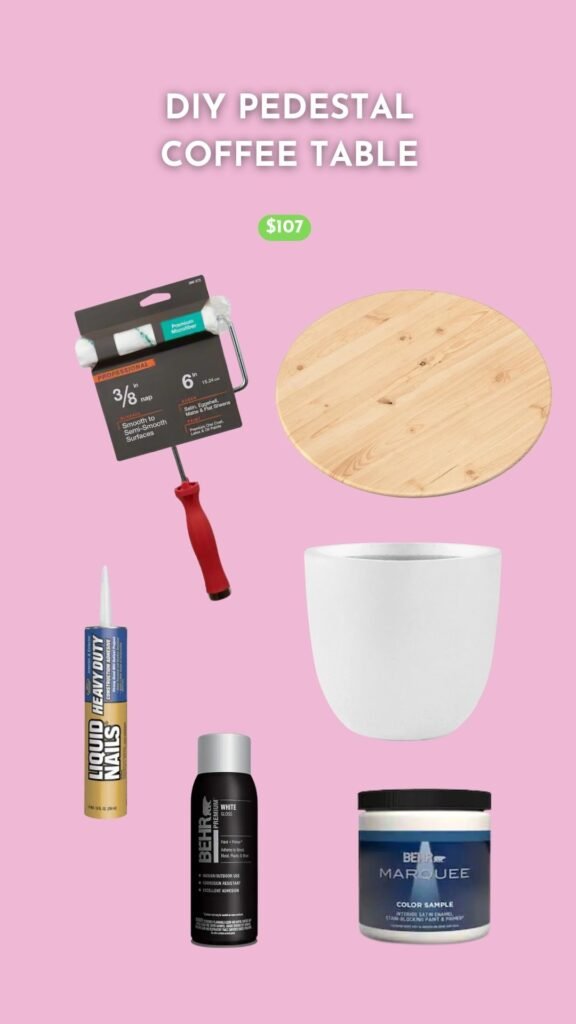
MATERIALS & TOOLS
- 36″ Pine Wood Round
- 18″ Concrete Planter
- Behr Spray Paint + Primer (satin finish)
- Behr Marquee Paint (satin finish)
- Liquid Nails
- Paint roller
- Level measuring tool
INSTRUCTIONS
- Prime your wood round and concrete planter with spray paint. Let it sit for a minimum of 4 hours or as indicated on the spray paint can. I did two layers of primer to make sure the wood was fully covered.
- Paint your primed wood and planter with your color of choice using a roller for a smooth finish.
- Let the paint dry for at least 6 hours or as indicated on the paint instructions. I did two layers of this outdoor paint.
- Once the pieces are dry, place the wood round on the ground with the underside of your table facing up.
- Mark the area where you want to place your planter.
- Apply liquid nails to the center of wood round where you will place your planter.
- Flip the planter over with the underside facing up. Apply pressure to the planter so that it adheres to the wood round and the liquid nails fills in any gaps. Use the level measuring tool to make sure the planter is sitting level.
- Allow your table to dry according to the cure time on the liquid nails packaging.
- Once the liquid nails cure time is over, flip your table over and voila!
I love this DIY so much and I would definitely make smaller versions. It turned out even better than I thought it would. I can’t wait to make some fancy charcuterie boards to place on this DIY coffee table!
If you make your own coffee table please tag me on Instagram I would love to see and share your build!